The Fold That Gives Paper a Sturdy Corner
Learn how to fold paper into a sturdy corner with a light score, careful alignment and a fold direction suited to your sheet for a cleaner finish.
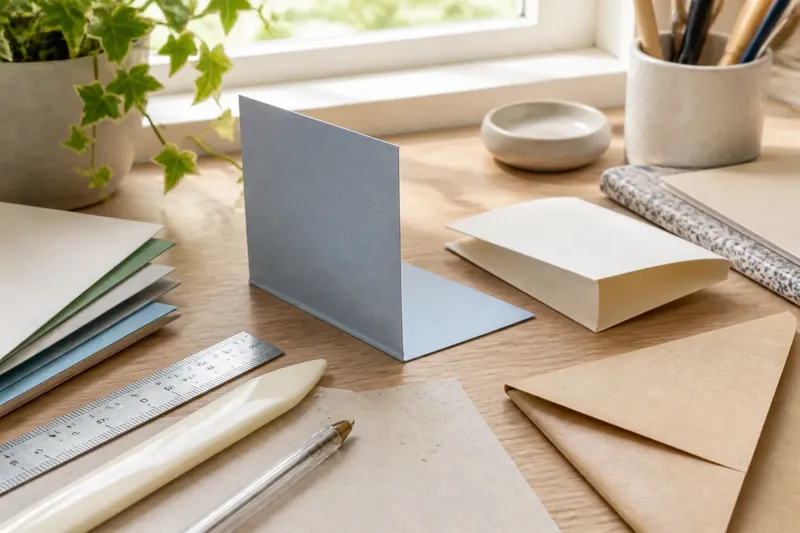
A paper corner often turns lumpy when the crease fights the sheet, not because it needs more force. To fold paper into a sturdy corner, mark the bend, score it lightly and test which direction suits the paper. That approach helps with a folded pocket, sleeve or simple card stand.
Why does a planned line make a stronger corner?
A faint score gives the sheet a path to follow. It should guide the bend, not cut through the surface; a deep groove can become a weak spot that splits when folded.
For a right-angle corner, mark the bend with a ruler and a blunt tool, such as an empty ballpoint pen or bone folder. Put scrap paper beneath the sheet to protect your table. A rigid ruler is easier to keep steady than a flexible one.
Make one light pass first. In raking light, the line should be visible without looking scraped, furry or sharply grooved. If needed, add another gentle pass rather than pressing hard at once.
Why does the paper buckle beside the crease?
A ridge beside the fold can mean the bend was not guided or the sheet was pushed too abruptly. Thick paper may resist a tight turn. Forcing it in one movement can stretch the outer surface and bunch material along the inside.
Score the line, then bring the sides together gradually. Keep the score beneath the fold rather than dragging the sheet across the table. Once the bend is formed, smooth it with the broad edge of a bone folder, not a sharp corner.
If the corner still puckers, check whether the fold sits close to another crease, cut or layered edge. Shift the line if the design allows, or try a thinner sheet for that section. An offcut can help you see whether the stock is contributing to the problem.
Which way should the fold turn?
Paper grain describes the direction in which fibres tend to lie. A fold parallel to the grain may feel smoother, while a cross-grain fold can feel stiffer or show more cracking. The result depends on the particular sheet, its finish and the fold, so treat grain direction as a useful clue rather than a fixed rule.
If the grain is not marked, gently bend a spare strip in each direction. Compare the resistance and the surface afterwards; the easier bend may make a cleaner crease, but the result is not certain for every stock. Choose the direction that best suits the design, and avoid repeatedly flexing the actual corner.
The visible face matters too. If the outside needs to look crisp, check how that face sits over the bend. On coated or printed stock, test an offcut first: one orientation may scuff or crack more visibly than another.
Why does the corner open after folding?
A crease can look sharp and still spring open if the paper is under tension. The flap may be too wide, the line may be skewed, or several layers may pull in different directions. More pressure can flatten the surface temporarily without correcting the cause.
Before burnishing, bring the edges together and see whether the corner closes without being held. If one side overshoots, adjust the alignment rather than pressing harder. For a layered corner, fold the thinner layer first, then bring the outer layer over it to reduce bunching at the meeting point.
Say you are making a small paper sleeve and its front flap springs up at one corner. You find that its marked line sits diagonally, redraw it square to the edge, score lightly and fold from the centre towards each side. The expected visible result is a flap that sits more evenly, with less strain at the tip.
What should you check when a fold splits or looks ragged?
A split may point to a score that is too deep, a direction the paper resists, or stock that is brittle or heavily coated. Ragged fibres can also appear if a pointed tool is dragged roughly across the surface. Stop pressing harder; that can enlarge the damage.
- Inspect the score: If it has cut through or lifted the surface, use a blunter tool and lighter pressure on the next piece; if it is only faintly marked, continue with a gradual fold.
- Compare fold directions: If a test strip bends more cleanly one way, use that direction where the design permits; if neither direction helps, try different stock.
- Check the finish: If the coated face cracks on an offcut, change the fold orientation or choose paper intended for folding; if it stays smooth, use the tested orientation.
- Watch the bend: If the sheet wrinkles as it closes quickly, reopen it gently and form the crease in a slower movement; if it stays flat, carry on without adding force.
- Inspect the edge: If a tear reaches the finished corner, trim it only when the remaining dimensions still fit; otherwise start with a fresh piece.
- Check nearby layers: If another crease or layered edge crowds the fold, shift the line or simplify the layers; if there is clear space, keep the planned line and reassess the score.
For an object that will be handled often, a slightly rounded inner fold may be more durable than a razor-sharp crease that has broken the surface.
How can you tell whether pressure is helping?
Pressure should define the fold, not crush it. Too little can leave a vague bend; too much may polish the paper, flatten its texture or damage the fibres. Form the angle with your fingers, then run a bone folder or the rounded side of a spoon along the crease with steady pressure.
Work from the centre towards the ends. This can help move small air pockets out rather than trapping them at the tip. Keep the tool travelling along the fold; sideways pressure may pull the layers out of alignment.
If the surface is delicate, lay a clean scrap over the crease while smoothing. It reduces direct rubbing while still allowing you to feel the pressure.
What should you check before choosing a scoring tool?
Tools leave different marks. A bone folder has a broad, smooth surface that can press a crease without making a sharp groove. An empty ballpoint pen can mark a guide on plain stock, but its tip may leave a visible track on soft or coated paper. A knitting needle can work on an offcut if its end is blunt; a pointed end is more likely to score too deeply.
Choose a tool with a blunt contact point that feels comfortable to hold. Keep the ruler steady with your other hand, and move the tool away from your fingertips. If the paper maker or tool maker gives instructions, follow them.
What questions help diagnose a stubborn fold?
Should I score both sides of the paper?
For a simple corner, one light score on the inside of the fold is often enough. Scoring both sides can leave extra tracks or weaken the sheet, so try a single score on an offcut first, especially with thin paper.
Can I use a knife to make a sharper crease?
A knife can cut rather than score, so it is unsuitable for an ordinary folded corner. Use a blunt folder or rounded tool instead; treat any intentional cut as a separate task and handle the blade with care.
Why is one corner neater than the other?
The second fold may run in a direction the sheet resists, or the first crease may have shifted the paper. Compare both lines with a ruler and test the directions on an offcut; supporting the sheet as you fold can also help prevent a twist.
Can I rescue a crease that has gone crooked?
Open it gently and check whether the surface is intact. If it is, align the sheet with the intended line and make one careful new fold rather than repeatedly reversing the crease. An old line may remain visible, so a fresh piece may suit a prominent corner better.
How does a sturdy paper corner come together?
A dependable corner starts with a planned line, an approach suited to the particular sheet and pressure that shapes rather than bruises it. Test thick, coated or unfamiliar stock on an offcut, then use what the test reveals to choose the fold direction and tool.
When you fold paper into a sturdy corner, pause at the first sign of resistance. Check the score, alignment and direction before adding force; that small pause helps preserve the surface and keeps the crease under control.